What’s one thing you can’t ever have too many of? For me, it’s definitely tote bags! Today’s tutorial will show you how to put a POP Embroidery Fill/Applique or Mini Quilt design onto a tote bag. With a little bit of help from Embrilliance and your sewing machine, you’ll have a new one–of-a-kind tote bag to walk around town with in no time!
Supplies Needed for Embroidery
-
POP! Embroidery Fill/Applique Design or Mini Quilt of your choice
-
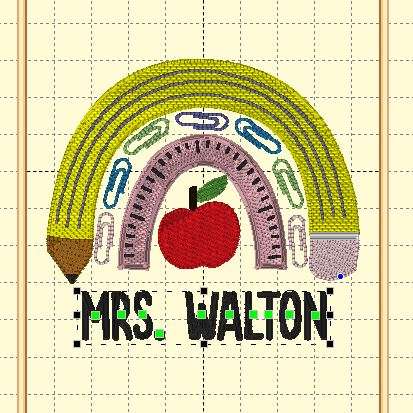
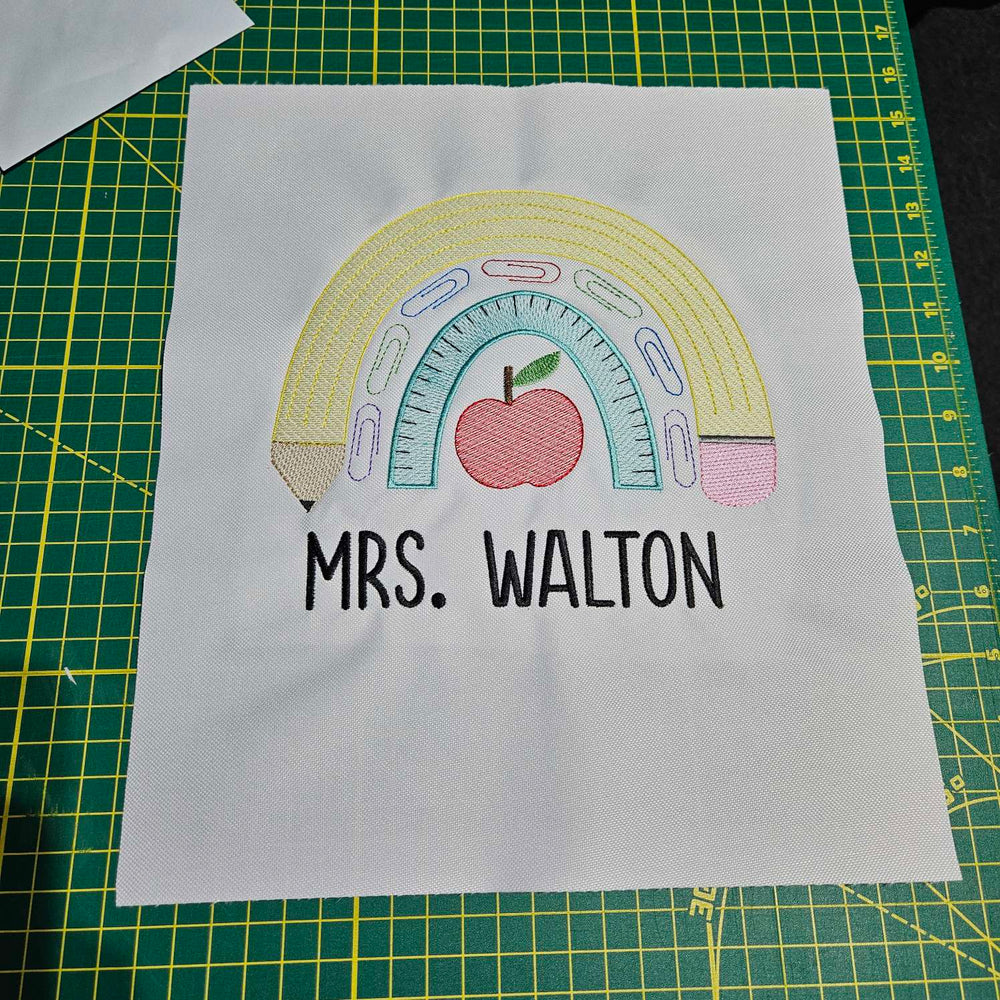
The Rainbow Pencil Embroidery Design was used for this tutorial.
Supplies Needed for Tote Bag
*If you have a free arm embroidery machine with the ability to hoop a pre-made tote bag, you could purchase a blank tote bag, skip the steps for sewing your own, and embroidery right onto the purchased bag!*
-
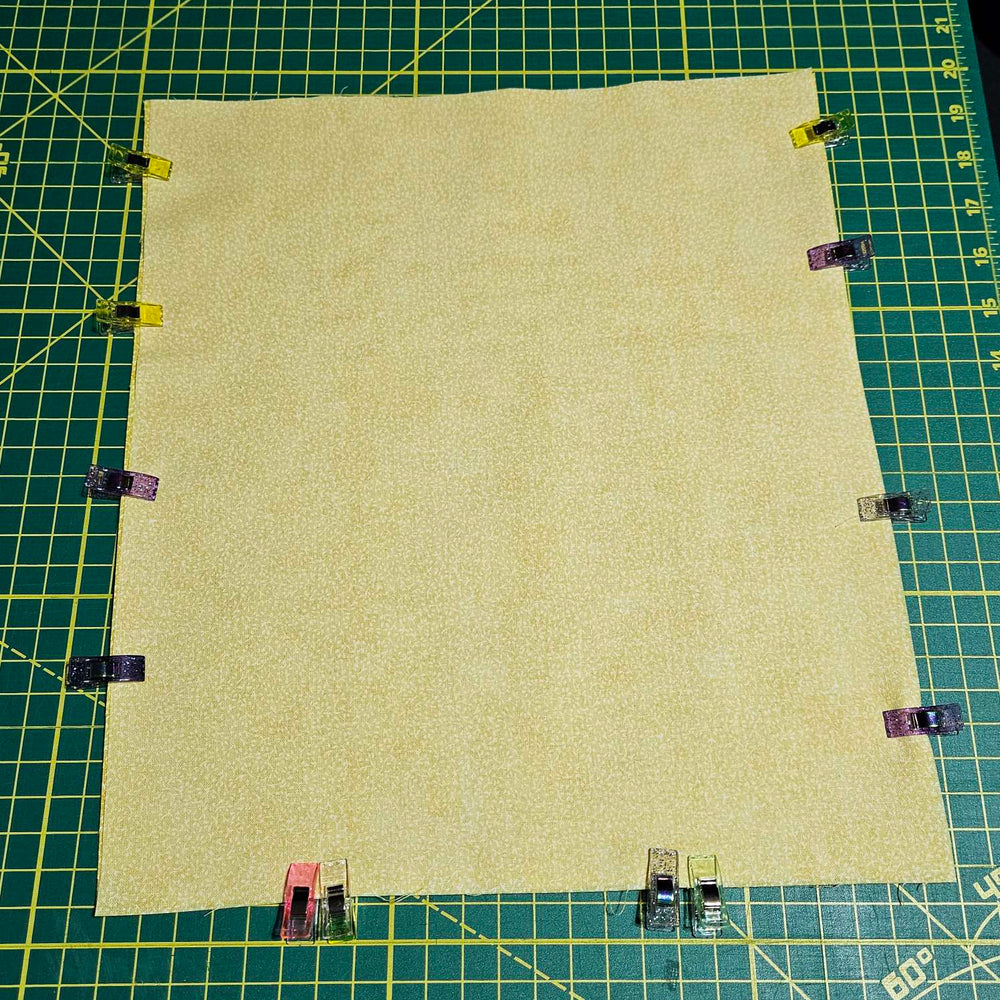
(2) 12in. X 14in. pieces of cotton woven, canvas, etc fabric for the exterior of the bag (I used a white waterproof canvas for this tote bag.)
-
(2) 12in. X 14in. Pieces of cotton woven fabric for the lining of the bag
-
*Optional* (2) 12in. x14 in. pieces of fusible fleece to add structure to the exterior fabric of the bag
-
1 yard of webbing, cut into (2) 18 inch pieces for straps of tote bag

Instructions
- On your computer, download the POP Rainbow Pencil embroidery design and save it to a location you can easily find it. (I save my designs to a USB stick, but also back them up on an external hard drive every few months just in case my USB sticks ever decide to stop working.)
- Open Embrilliance Essentials software on your computer.
- Click the “Open” folder on the upper left side of your screen. The POP Rainbow Pencil embroidery design will now be loaded in the middle of your screen.
*I used the 6x10 size embroidery fill design and a 9x14 hoop so that I could turn it 90 degrees horizontally and add the teacher’s name below the rainbow.*
- If you’d like to add a teacher’s name below the pencil rainbow, find the blue “A” in the upper middle of your screen. Click the “A”. This will pull up a second “Object” on the right side of your screen in the objects box with the default text “ABC”.


- In the properties box, click on Object 2 and click the “Letters” tab. Enter the new text with the teacher’s name in place of the default “ABC” and select the font and size of the text you would like. (I used DesignsbyJuju “Finn” in size 1.25 inch for the teacher’s name.


-
Click on the text with the teacher’s name in the middle of your screen and move it to be centered below the rainbow pencil design.
-
Add a Basting Stitch! *THIS IS SO HELPFUL AND IMPORTANT*. It will help your design be secured to the fabric.
- To Add a basting stitch, Click “Edit > Select All”. Both objects will now be surrounded by a box.

- Click “Utility > Baste Design”. A solid black box will now appear around the outside of your design. This basting stitch will now show up as “Object 1” in the panel on the right side of your screen.


-
Time to save your design!
-
Insert your USB stick into your computer. Then click “File > “Save As (Stitch and Working)”
-
Navigate to your USB Drive and desired folder and then click “Save”.
-
Insert your USB Drive into your embroidery machine and load your rainbow pencil design.

Let’s Prep Your Tote Bag!
-
Particularly if you’re using cotton woven/quilting cotton fabric, I highly recommend interfacing your two exterior pieces with fusible fleece. This will give your bag more structure.
-
Take one of your exterior pieces and place it in front of you with the 12 inch sides on the top and bottom. *Your bag should be taller than it is wide.* This will be the piece that you embroider the rainbow pencil design onto.
-
Find the middle of the 12x14 piece by folding it in half lengthwise and widthwise. Mark the center lightly with a heat-erasable pen such as the Frixion pen.

Back To The Embroidery Machine
-
Hoop cutaway stabilizer. *Don’t use a polymesh cutaway-it will be too thin.* I ran out of my thicker cutaway that is wide enough to fit my 9x14 hoop, so I hooped polymesh but then floated a large piece of thicker cutaway behind my hoop! :-)
-
Place your prepared front exterior tote bag piece with the center marking in the middle of your hoop. Most embroidery hoops should come with a grid plastic piece that you can lay on top of your fabric and hoop to help you center designs in your hoop on fabric.
-
Move around your front exterior fabric piece on the hoop until the center marking you made lines up with the center mark of the embroidery hoop plastic grid. Adjust your design vertically to where you would like it. (I wanted the design a little higher than directly in the middle, so I scooted it up about 2 inches from the exact center vertically.)
-
Carefully remove the plastic grid and tape down your fabric piece or pin around the edges far away from where the design will be stitching.
-
Run Step 1-the basting stitch you added.
-
Run Steps 2-15- the steps of the pencil rainbow design.
-
Run Step 16- The teacher’s name text you added.
-
Remove the hoop from your machine and take the fabric out of the hoop.
-
Use a seam ripper to carefully remove the basting stitches from the design.

Assemble Your Tote Bag
If you’ve sewn a tote bag before, you can totally ignore these directions and assemble your tote bag however you’d like with your sewing machine! If by chance you haven’t, these steps will walk you through how to sew a tote bag.
-
Set your embroidered front exterior piece of fabric in front of you face up.
-
Place the second exterior piece of fabric on top of the embroidered front piece with right sides together (RST). You should be looking at the back side of your fabric. Clip around the two 14 inch sides and along the bottom 12 inch side.
-
Place your two lining pieces together RST. Clip along both 14 inch sides and the bottom 12 inch side BUT LEAVE A 4 INCH OPENING ON THE BOTTOM UNCLIPPED. This is the hole you will turn your bag through when your bag is done.

-
Sew along the sides and bottom of the exterior pieces with a 3/8 inch seam allowance.
-
Sew along the sides and bottom of the interior pieces with a 3/8 inch seam allowance but remember to leave an opening in the middle of the bottom side .
-
Trim the bottom corners but be careful not to accidentally cut any stitches. *You could also box the corners of the tote bag if you’d like your bag to have a flat base.*
-
Turn the exterior pieces right facing side out but leave the lining wrong sides facing out.
-
Grab your two 18 inch pieces of webbing.
- Find the top, open end of your outside fabric tote pieces. Measure in two inches from the left and right sides and clip your straps in place. Be sure that your straps aren’t twisted before sewing them down.


- Sew across each piece of webbing at 1/8-3/8 inch seam allowance. (I like to leave just a quarter inch of webbing excess above the top raw edge of the bag to help be sure it won’t pull out down the line. You can also seal the edges of the webbing with fray check.)

You’re Almost Done!
-
Leave your exterior tote bag pieces right side facing out.
-
Your lining pieces should have the wrong sides facing you, and right sides are inside.
-
Slide the outside pieces into the lining pieces. The right sides of the bag should be touching inside of the bag.
-
Line up your lining pieces and exterior pieces along the top edge.
-
Clip the side seams together taking your time to line up those seams the best that you can.
-
Find the halfway mark between the straps and clip the pieces together here, and add a few more clips along the top edge. Make sure your straps are between the lining and the outside fabric. (insert pic 20)
-
Begin at one side seam and sew along the entire top, open end of your tote bag with a ½ inch seam allowance.
-
Turn your bag right sides out through the opening in the lining at the bottom.
-
Close the hole in the lining with your favorite method- Fabric glue, Steam-A-Seam tape, or by sewing it closed.
-
Push your lining down inside of the tote bag and give it a nice iron to press out any wrinkles.
-
Finish with top-stitching across the top of your bag at a slightly longer stitch length.

You’re done! Have fun browsing through the POP designs for other embroidery fill/applique or mini quilt designs that you could put onto a tote bag! We LOVE seeing your creativity and can’t wait to see what you make! Share with us over on the Parker on the Porch Facebook group. Happy stitching!